Picking or throwing seems to be a big issue with knitters. I learned 'throwing' as a child and knitted a few sweaters but preferred crochet at the time. In 1971 I moved with my husband to Iceland (with U.S. Navy) and found out there was an Icelandic Lopi Yarn factory in the next town. They sold the yarn in bags, practically giving it away. We took it home, rolled it into balls, and knitted those wonderful intarsia patterns (we called them Icelandic Sweaters) in shades of brown and gray.
My first sweater was knitted very tightly and had no comforting 'stretch'. My friend met an Icelandic girl who told us we needed to learn 'Icelandic knitting', that the yarn was not plied, so had no natural 'give' and we had to knit the 'give' into the garment using the method she would teach us. This method was the 'picking' method of knitting.
Since I know how to do both types of knitting, I have taken to switching back and forth at random. Right now, picking is faster, but throwing I can do without looking. Throwing makes my shoulder and arm ache a bit, but picking can make my hand stiff. So I switch back and forth, sometimes in the middle of the row! I find I absolutely cannot begin a row with the picking method. And I cannot do any 'patterns' with that method either. Also, my picking is not as smooth as throwing, so if the stitches show, as in cotton yarn, it has to be all throwing.
I am working with some Caron Simply Soft acrylic yarn making a shrug, and those stitches don't show at all, so am working on being able to pick without looking....just by feel. I am always looking for a new challenge.
The purpose of this essay is to encourage all knitters to learn both ways to knit. Also, learn combined knitting (which I understand, I think, from Knitting in Plain English, is really Continental knitting....European is the complicated purl stitch that makes a knit stitch with the front 'leg' forward, Continental purl is easier but that back 'leg' is forward. I like the Continental purl better but hate digging into that back leg on the knit stitch.
Which are you, a Thrower or a Picker? And which kind of Picker, Continental or English?
Tuesday, October 17, 2006
Required Reading
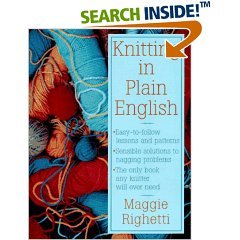 This book is an absolute must-read for any knitter who wants to expand beyond garter stitch scarves. I have been knitting off and on for over 40 years and I learned so much. For the first time I understand how to find the spaces along the edge when seaming with a mattress stitch. I learned an amazing way to keep up with increases and decreases without having to jot it down on a piece of paper or keep two row counters going (one for the row I am on, the other for the number of increases or decreases I have done). I checked this book out from my public library, but I need to buy a copy that I can cover with highlighter and bookmarks! Get a copy of this, read it cover to cover, and you will be so glad you did.
The image was copied from Amazon.com.
Thursday, October 05, 2006
Autumn is Coming

Even though it is 80 degrees out there, I KNOW autumn is coming and I am ready to wear fall colors. My "cool summer bag" looks so out of place right now, so I cast on another version for fall. I love this version. Again, it is leftover yarns, although the dark green is some Elann.com yarn that was supposed to be placemats.
I really like zippered closures on my purses, so decided to take the plunge with this one. I put the zipper into the lining and then stitched the lining to the purse, stitching through the zipper at the same time. I made a beaded zipper pull, since the tiny metal one was very hard to grab. I decided to make the purse hobo style, so I made one handle and attached it at each end.
General instructions:
Knit a garter stitch rectangle the size you want the bottom of your purse to be. Do not cast off, when you knit your final row, pick up stitches all around the bottom and join to make a tube. This is going to be very awkward and you need a circular needle. It will get easier as the purse grows. Knit every row, changing yarns whenever the mood strikes and knit until it is the size you want.
Make a lining and put a zipper into the top of the lining. Then put the lining into the purse and attach the lining to the purse near the top. You really have to be able to sew to make this zippered lining and have a good sewing machine.
For the handle, I used a crochet hook and picked up some stitches on the purse where I wanted the handle to start and did a few rows of crochet, then did fat icord. I held two strands of yarn together and used size 11 dpns. Changed back to crochet and the other end.
The purse was ALMOST done. I wanted a flower! I crocheted a layered flower , making each layer of petals a yarn I had used in the purse. I do not have the web site on this one, but you can Google crochet flowers and find one you like. I strung beads onto some yarn, using one of those dental floss thingies that come in a little plastic box in the drugstore, and sewed it to the center of the flower and then sewed the flower to the handle.
Subscribe to:
Posts (Atom)